


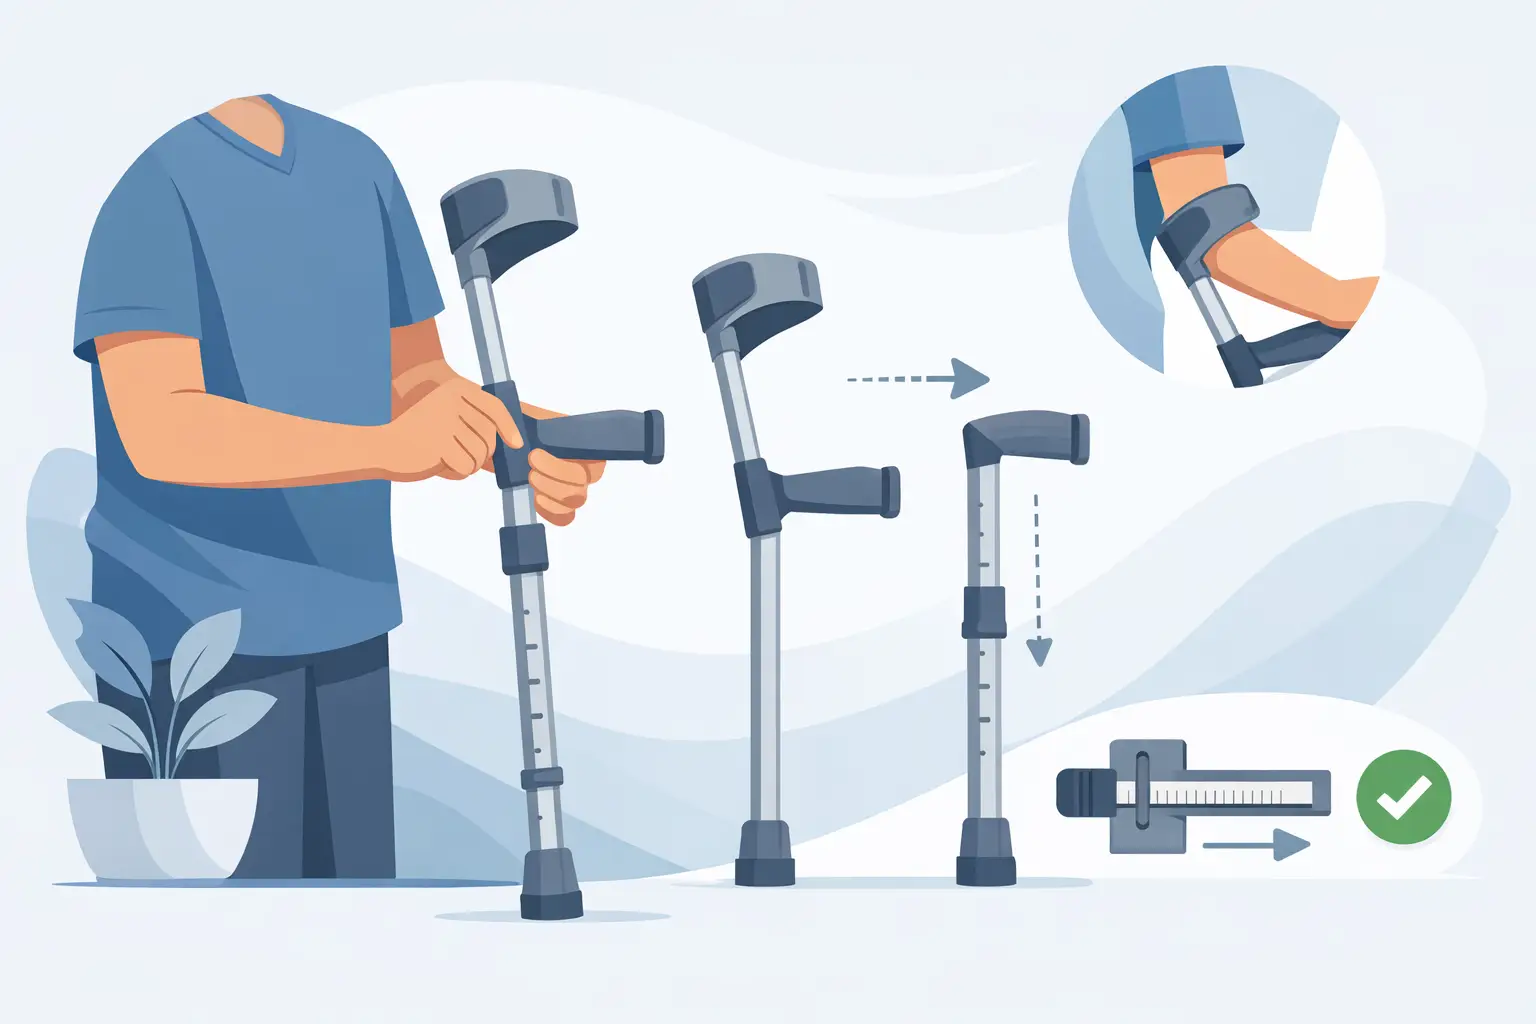
After an operation, an injury or when your ability to bear weight is permanently limited, forearm crutches can make walking safer and help you take targeted weight off one leg. This guide shows you how to adjust forearm crutches correctly. Even a few centimetres too high or too low can cause pain in your hands, shoulders and back, or increase the risk of falling.
Your doctor’s instructions on weight-bearing always take precedence. Whether you can put no weight, partial weight or full weight on a leg depends on your diagnosis and treatment plan. Adjusting your walking aids correctly does not replace these instructions, but it does help you follow them safely in everyday life.
How to adjust forearm crutches correctly: a guide to handle height
First, adjust the forearm crutches on a level, non-slip surface. Wear the shoes you will usually use when walking. The thickness of the soles has a significant effect on the required length. Also check that both crutches are set to the same height.
Stand upright. Keep your feet hip-width apart, relax your shoulders and let your arms hang loosely by your sides. The handle should be roughly level with your wrist—more precisely, with the wrist crease. At the correct height, your elbow should be slightly bent when you hold the handle, usually at an angle of about 15 to 30 degrees.
This slight bend is important: if the handles are too high, your shoulders will rise as you walk, putting strain on your neck and shoulders. If they are too low, you will have to lean far forward and support too much of your weight with your arms fully extended. This can put excessive strain on your wrists, elbows and lower back.
On height-adjustable models, loosen the connection, press in the locking button and select the same hole on both sides. The locking button must be fully visible and audibly click into place. Then pull firmly on the lower tube. If it moves, do not use the crutch.
Positioning the cuff correctly
The forearm cuff guides the walking aid. It should not sit directly in the bend of your elbow, but a few centimetres below it. As a guide, leave a gap of about two to three finger widths from the bend of your elbow. This allows your elbow to move freely as you walk without the cuff pressing or rubbing.
Depending on the model, you may be able to adjust the cuff’s height, circumference or opening direction. It should fit securely around your forearm without constricting it. Numbness, tingling, pressure marks or cold fingers are not normal. Loosen or adjust the cuff, and have a professional check the fit if the discomfort persists.
The cuff also has an important function: your body weight should be supported through the handles and your palms, not through the forearm cuffs. The cuffs mainly prevent the crutches from falling to the floor if you briefly let go. Prolonged pressure on the forearm can put strain on the skin, nerves and blood vessels.
Check before your first walk
After adjusting the crutches, take a few minutes to check that they are working safely. Start in a clear room with a firm, dry floor. Check whether you can stand straight without raising your shoulders or leaning to one side. Keep the crutches close to your body rather than placing them far out in front of you.
Also check the equipment for safety. The rubber tips must be intact, slip-resistant and evenly worn. Worn, split or hardened tips quickly lose their grip on smooth floors. Regularly check the screws, cuffs, handles and locking mechanisms. A connection can come loose, particularly after a fall or when transporting the crutches in a car.
For care facilities and family members: if several people prepare or reprocess walking aids, each aid’s settings must be clearly linked to the person who will use it. A similar height alone is not enough. Handle height, weight-bearing instructions, hand function and gait can vary considerably.
Walking safely with two forearm crutches
The correct walking sequence depends on how much weight you are allowed to put on the affected leg. Ask a member of staff at the hospital, a medical practice or your physiotherapy clinic to show you the technique prescribed for you. Instructions may differ, particularly after hip, knee, foot or ankle surgery.
If you are not allowed to put weight on one leg, or can only put limited weight on it, you will generally place both forearm crutches a short distance ahead of you first. Then move the affected leg between the crutches or up to their level. Next, bring the stronger leg forward. Keep your steps deliberately short. Taking large steps increases the risk of a crutch slipping or tipping sideways.
When partial weight-bearing is allowed, it can be difficult to judge how much weight you are putting on your leg: people in pain often take too much weight off it, while others put too much weight on it too soon out of habit. So follow the prescribed weight-bearing limit. If you have been given a specific limit in kilograms, your physiotherapist can help you practise controlling the amount using a bathroom scale.
Hold the handles firmly but without gripping them too tightly. An overly tight grip can cause pressure pain, blisters or irritation around the thumbs and the balls of the hands. Padded handles or gloves can reduce discomfort during prolonged use, but they do not replace a proper fit. If you have reduced hand strength, rheumatism, paralysis or significant pain, other handle styles or mobility aids may be more suitable.
Stairs, doors and uneven paths
There is a simple sequence to follow on stairs: when going up, place the stronger leg on the next step first. Then bring up the crutches and the affected leg. When going down, place the crutches on the lower step first, then the affected leg and finally the stronger leg. Always use a handrail if one is available.
Try not to carry anything in your hands. A shoulder bag, small backpack or transport accessory designed for your mobility aid is safer than a bag dangling from a handle. Take extra care around wet leaves, snow, loose gravel, cables or raised door thresholds. Walk slowly and avoid twisting on the leg bearing your weight.
Not every staircase is safe to use with forearm crutches. Narrow steps, a lack of handrails, poor lighting or significant balance problems may mean you need someone to accompany you or an alternative solution. Plan your routes realistically, especially right after surgery or if you have recently developed weakness.
Common signs that the fit is wrong
Discomfort does not always start straight away. As the day goes on, look out for warning signs such as tense shoulders, neck pain, pressure in your palms, numb fingers, sore forearms or worsening back pain. You should also have the fit checked if the crutches often slip, are positioned too far in front of your body when you walk or catch on your clothing.
You may also need to adjust the fit if your swelling changes, you switch to different shoes or your ability to bear weight improves during rehabilitation. For children, very tall people or people with severe obesity, the adjustment range of some standard models may not be sufficient. In these cases, check the weight capacity, length and cuff size before use.
When professional guidance is advisable
After recent surgery or an accident, or if your doctor has prescribed partial weight-bearing, a healthcare professional should ideally help you with the initial adjustment. The same applies if you have an unsteady gait, dizziness, impaired vision, a neurological condition or limited function in your hand or arm.
Seek advice promptly if your pain gets worse despite using the crutches correctly, pressure sores develop, a crutch is damaged or you repeatedly lose your balance. A different length, an ergonomic handle, a specialist model or an additional mobility aid may be a more suitable option.
Properly fitted forearm crutches should do more than help you take your next step. They provide the support you need to get around your home, go to therapy or manage everyday activities with greater control, reduced strain and independence.

